The Making of and Wearing of a Wedding Dress
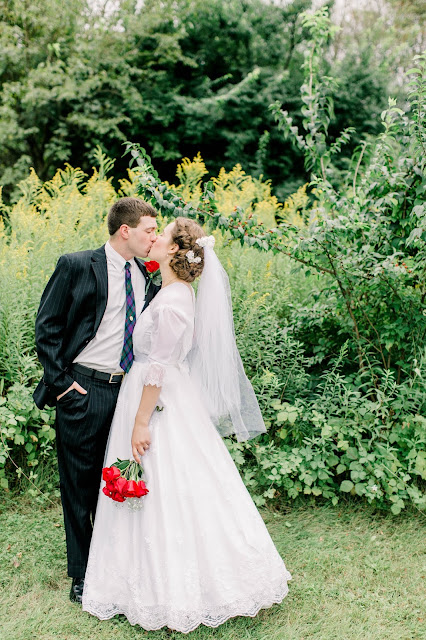 |
| Meghan Baskin Photography |
Well, this post has certainly taken long enough to write! It's been a little over fourteen months since I wore this dress, fourteen months and two weeks since I finished it (I'm not last-minute about anything, I don't know what you're talking about) and now I'm finally getting around to writing about it.
In September 2018 I wrote a post about all the hopes, reticence, self-consciousness and overthinking I had put into the planning of my wedding gown. Today I'm here to tell you that I wore it on my wedding day, had a beautiful day in which I married the love of my life, didn't tear anything, felt as comfortable as one can be amid the jitters of GETTING MARRIED, and danced in a skirt that swirled exactly as I had hoped - and still, the dress was not what that day was about. A lot of my trepidation on the subject was, all things considered, wasted anxiety. I'm very happy with it, though, and it looked nice in pictures, and it was not the be-all, end-all of the wedding day, and I am content with how it turned out.
With all that said, for those of you who sew, or are interested in design, or just like reading about wedding dresses, I am finally blogging about the process!
(I will not be apologizing for the enormous amount of wedding photos in this post. I love looking at other people's wedding photos, particularly those of the behind-the-scenes variety, so I hope some of you will enjoy these. Those who do not are free to come back for the next post. ;))
(I will, however, apologize to anyone who has a dial-up connection or very limited bandwidth. Heh. I'm sorry.)

I knew from the beginning that I wanted a dress that would be uniquely my own, and though I had a good-sized Pinterest board full of ideas, none of them exactly fit the notion inside my head. There were three basic design elements that were For-Sures:
~I knew I wanted elbow-length sleeves with engageantes, or at least a drape-y ruffle - that had been settled since I was a little girl coloring pictures in a Disney princess coloring book and being enamored of Ariel's green dress and its lovely, swishy sleeves.
~I knew I wanted an A-line shape with a gracefully flowing, but somewhat full, skirt. (But not a hoopskirt. I do enough damage in a hoop at Civil War events and knew that no matter how lovely the silhouette, it was not the experience I wanted for my wedding day.)
~And I knew I wanted a V-neck, or at least something approximating a V-neck, because I have always felt I looked better in clean lines rather than a scooped or rounded style.
Oh, and it had to be white, and stuff, and probably with a good deal of lace, but these ideas were hazy in my mind. I created a Pinterest board very soon after Rob and I got engaged (okay, I probably actually created the board before that happened, but a girl can dream, right?) and began actively saving pictures of different concepts that I wanted to incorporate into this gown. Soon enough, I had narrowed the field to two specific inspiration pictures: this and this.
Of course, my dress did not really end up looking like either of those images, but that is what you get when you work without a pattern and a limited amount of experience. I will not be opening a bridal atelier any time soon.
Howeverrrrrrrr, this is not a post decrying my wedding gown and listing all the things that weren't perfect about it, but rather celebrating the fact that I FINISHED IT and I was very happy with it, so onward.

The structural design built itself (with a lot of help from me, of course) as follows:
A petticoat of white muslin, underneath all. (Well, technically, a crinoline petticoat from 1991 was underneath all. This was my mom's bridal petticoat, and was my "something old." It worked perfectly and saved me one step in building the skirt shape.) This was fairly basic and easy - simple measurements to go over the existing crinoline, in paneled pieces, with a hem that was... maybe a little bit clumsy. (I hate hems and no one was going to see this anyway.) I hid the awkward hemline with a vintage "dust ruffle", aka white eyelet trim with a baby blue ribbon running along the edge. I had JUST ENOUGH. It was a bridal miracle. This was my "something blue."
As you can see, it was not particularly impressive, but it added that extra layer of Oomph to the skirt and hey, uh... something blue. Did I say that already? Yes.


The underskirt was done in A-line panels to achieve a wide bottom and narrow top. I'm accustomed to sewing full skirts for 1950's and 1860's fashions, so this was a refreshing difference (especially since I knew I didn't want a super-poofy ballgown skirt). I don't think I actually took any photos of this process. It was easy but fairly boring. The hardest part was the hem. I used a cheap poly taffeta (I KNOW. THE HORROR.) from Hobby Lobby since this part would not be very visible, and simply kept the ugly shiny side facing inward. That is to say, the "wrong" side (matte) was used as the right side. But it was still cheap synthetic satin (hey, I was only going to wear this dress ONCE, right? no use spending a FORTUNE here) and it frayed like Hartford, Hereford, and Hampshire. I probably would have had better success hemming it by hand, but I had no time for such larks as that (I was making three bridesmaid dresses as well, after all, commuting an hour each way for my full-time job, trying to see my fiance whenever possible, and still planning the rest of the wedding on top of all and sundry) so a clunky machine-hem it was. I do not regret this. Life is short and IT WAS NOT VISIBLE.
What was visible was the skirt overlay. This was chosen after extensive deliberation in various online stores and finally at JoAnn, which seems like a comedown, but hey, they had some nice bridal options. I cannot for the life of me remember what the exact fabric name was, but it had something to do with ferns, and was an embroidered tulle with a lovely scalloped edge. The store I typically frequent did not have enough yardage for my purposes, so I ended up going to two other stores as well to get all I needed (it wasn't available online). It was a nervous endeavor but I finally did get enough (and was able to use various coupons with my various purchases! win!). I made the skirt overlay by gathering a large rectangular tube of this fabric over the A-line underskirt. The scalloped edge created its own hem, although I wasn't a fan of the eyelash edging (shown below) so I cut all of the eyelashes off. Painstakingly. Neurotically. By hand. (It was worth it.)

(More full-length photos of the skirt in the final product will be shown later.)
The bodice was the hardest part of the entire project, which is probably because I wasn't 100% sure how I wanted it to look. I'm very happy with the finished result, but it didn't end up exactly the way I had envisioned it before I began. (Does anything, ever?) In my head, originally, this was a very sweeping, elegant crossover bodice that was all Gauze and Floaty Tulle and Illusion but still maintaining, of course, a very flattering silhouette, and also being opaque because this is not lingerie, after all, but still giving that impression of iridescence and sheerness, and also a v-neck, and also closely fitted but still light and kinda shimmery, except I didn't want to actually WORK with any shimmery fabric because shimmery fabric hails straight from the pit of Hades, and...
...you see where I'm going with this.
It was well nigh impossible.
I did make a few valiant efforts, though. Behold.

"Uh, I'll just drape this chiffon across here and pin it... here... and... something."
Yeah, that went about as well as you'd imagine.
Around this point I thought about making just a plain square neckline instead of the V neck (I am nothing if not experimental in the early stages of sewing) and tried out this style. I did not much like it, but it did show off the lace very prettily.

Then I did this. Closer, but still not quite what I was going for. It was too... blah. I did have an important structural element in place by this time, though, which was the strapless bodice foundation. (I knew I wanted sheer-ish shoulders that would show off the beautiful whitework on this embroidered tulle - the same fabric you see in the skirt overlay). The bodice foundation is the same low-quality taffeta I used for the skirt. It did nothing more than provide a fitted, opaque canvas for the pretty part to be built upon, so the fabric itself didn't matter much.
(Here we also see the Very Important Measurement for the depth of the V neckline - it had to show off the pearl-and-heart pendant I was going to wear, because this was the first piece of jewelry Rob ever bought for me and it has quite a bit of meaning for both of us. Obviously, it had to make an appearance at our wedding.)

Here, then, is what I finally ended up with. Still a V neck, still sheer across the shoulder, but not quite so geometrically cut-and-dried as before. As I put the finishing touches on the dress weeks later, I realized that the softer substance of this bodice overlay de-emphasized the fit of the bodice, which in blunt terms made me look larger in the torso than I would have liked. This was not the end of the world, but if I had it to do over I probably would have nipped in the sides more and pulled the whole thing a tad snugger. This is actually two layers, in point of fact: one of embroidered tulle and one of sheer chiffon. I probably could have gotten away with just the tulle, but hey, live and learn.

Below, you may observe a rather low-def photo of one of the biggest wastes of time I undertook during this process. In retrospect it was certainly an exercise in patience so I don't think it was really truly wasted, and I am also a firm believer in Pretty Details That No One Knows About Except You, as they are food for the soul (although I'm ALSO an advocate of Just Finish The Darn Thing The Way You Want And Don't Worry About Cutting Corners That No One Will See, and yes the two can coexist). I felt that the seam lines in the bodice were too glaring and needed to be softened, so I cut out individual embroidered flowers from my tulle fabric and painstakingly appliqued these - by hand - over the offending seam lines. NO ONE EVER SAW THIS and honestly the lines weren't that visible anyway. Probably don't do this, if you ever make this kind of dress. It was not brilliant.

The elbow-length sleeves (a style which has pleased me aesthetically since my very young days) were fairly simple, draped to fit, and made from a rather difficult and slithery chiffon (the same as seen above in the two-layer bodice overlay). I made some impossible hems for the edges of it. Ring for scale. (Every bride needs the ostentatious Photo Of Something That Isn't The Engagement Ring But Oh-So-Casually Includes The Engagement Ring Just In Case You Haven't Seen It Yet.)

The drapey sleeve lace, also known as engageantes, was a fun and quick addition to the sleeves. This lace did not have eyelashes like the skirt overlay, but it was embroidered directly on tulle and required the meticulous cutting out of the scalloped embroidery and discarding of the excess tulle. I watched three Audrey Hepburn movies while I was doing all my tulle cutting, by the way. She is a gem.


Gathering that top part of the skirt overlay was tricky, too. Tulle likes to tear, in case you didn't know. And though I may have had better and less stressful success hand-gathering, ain't nobody got time for that. I was working a new job at this point that involved an hour commute each way. Hand sewing is for people with TIME.

THEN CAME THE MOMENT OF TRUTH - sewing all the individual pieces together and adding the satin ribbon sash to tie up the whole ensemble (ha, ha). This part was fun, but scary. My wiggle room for making changes was getting slimmer and slimmer.

See above for another gratuitous ring photo. So sue me.
For anyone who's interested, by the way, the total cost of the whole ensemble including the veil was $102, which is $2 over budget, but the extra expenditure didn't keep me up at night. I'm still pretty proud of this. It required a lot coupon-ing and shopping sales, but we were able to save the majority of our wedding budget for the things that really mattered to us, like food. (Cupcakes were very important to Rob. They still are.)
Oh, speaking of the veil, I have exactly one picture of the veil under construction, and here it is.

It was kind of ridiculously easy, actually - a length of tulle and a headdress made of satin roses that I bought from JoAnn (heh), and just stitched the two together. It was the product of one afternoon. (I had thought about edging the veil with lace because lace-edged veils have always been on my dream Pinterest boards, but this proved too difficult to get the effect I wanted with the kind of lace that was in my budget.)

True to tradition, I refrained from showing any aspect of the dress, in progress or in its finished glory, to my fiance before the Big Day. This was difficult in some aspects because the guest room at my parents' house also doubled as my sewing room, and when he stayed over, guess where he slept? In the room where I had to hide all vestiges of the dress. But (as far as I'm aware), he was a good boy and did not peek.
I did, however, bring it out to show off to my girl friends two nights before the wedding, when we had a very low-key bachelorette party in my parents' living room (pizza, chocolate cake, and The Princess Diaries 2: Royal Engagement). I had wanted a cheesy slumber-party-like bachelorette shindig ever since I saw The Princess Diaries 2, so that was fun. ;)
 |
| I am sitting Very Awkwardly on the arm of my parents' couch on the left-hand side of this photo. Ignore the weird leg and weirdly placed hand. They are mine. ...I probably didn't need to tell you that, and you could have just assumed it was some awkward woman who had no place in this photo and could be righteously ignored, with no embarrassment to myself. |
We now segue to the professional wedding photos (interspersed with some taken by kind family and friends) from Our Wedding Day. I will present these without a ton of captioning and you can just scroll through.


(The earrings I wore were one of my "something olds" - the same that my mom wore on her wedding day!)


Those of you who have been reading my blog(s) since the early days will know that this is how my best friend, Melody, and I met. She was a gift sent from heaven above on my wedding day and in the whole crazy, emotional week leading thereunto! I could not have gotten through that hectic time without her. She is truly a pearl above price and the best friend I could ever have imagined. In addition to emotional and spiritual support, she also helped me finish all the bridesmaid dresses in time!! Those will be the subject of another post. ;)


He does think it is reasonable to start 15 new loads of laundry without folding any of the previous batches, though. Just so you don't think he's some perfect ineffable cosmic being or anything. ;)


And then they lived happily ever after in a tiny apartment where the stovetop caught on fire one day, and working hours were long and college was expensive, and sickness happened and it was hard to keep the bathroom clean, and the cat kept throwing up at random intervals, but each of them had found the one their soul loved, and happiness abounded in between - and, with maturity, during - all the things listed above. Grace upon grace, indeed.
The End.


This is the post I've been waiting for! I love watching the construction of other people's wedding dresses (*cough* note-taking purposes). Having a decided fondness for engageantes, I really do love those sleeves--and I wholeheartedly approve of the decision to appliqué embroidered flowers over the seam. But goodness, is it painstaking...
ReplyDeleteWell, this will all boil down to you looking lovely (the hair! I request more about the hair, please :) ), the dress looking lovely, and delight over the happily-ever-after (vomiting cat notwithstanding), and I really do need to leave for work, rather than read lovely blog posts.
P.S. Eyelash lace really does deserve to be snipped off...
This is such a great post, Amy! And you certainly have never lost your flare for writing. ;)
ReplyDeleteYou both look great in the photos!
ReplyDeleteYour dress is soooo beautiful. May God continue to bless and keep you both!!
ReplyDeleteYour dress was gorgeous!! Sad to say, I don't have a knack for sewing even though I enjoy it. Maybe because I am self taught, hm? Anyway, yay!
ReplyDeleteThank you so much! It honestly takes more practice than a knack, I think. I still have my fair share of dismal failures (I'm self-taught, too!).
DeleteHey, Amy - Just wanted to let you know that Grace and I tagged you twice on our blog! :)
ReplyDeletehttps://maidensofgreengables.blogspot.com/2020/04/catching-up-on-tags.html